This article is intended for use by clients of Ziptech Services Ltd that have device support for Apple devices.
If you don't use or are not sure of Ziptech Services support your Apple devices, please check with whoever is the primary contact for Ziptech Services at your company.
What is a Self-Service Install?
A Self-Service install is a package that has been put together/deployed by Ziptech Services for you to be able to install software yourself without the need for admin approval.
How do I access Self-Service Installs?
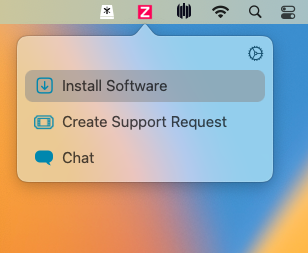
- In the top right hand corner of your screen near the WiFi icon you should see a Red Z icon. Click on this and then click 'Install Software'.

If you don't see the Red Z icon anywhere along the top bar, your device is likely not a Ziptech Supported machine.
If you believe your device should be under Ziptech Support, please contact our Helpdesk via the usual means.
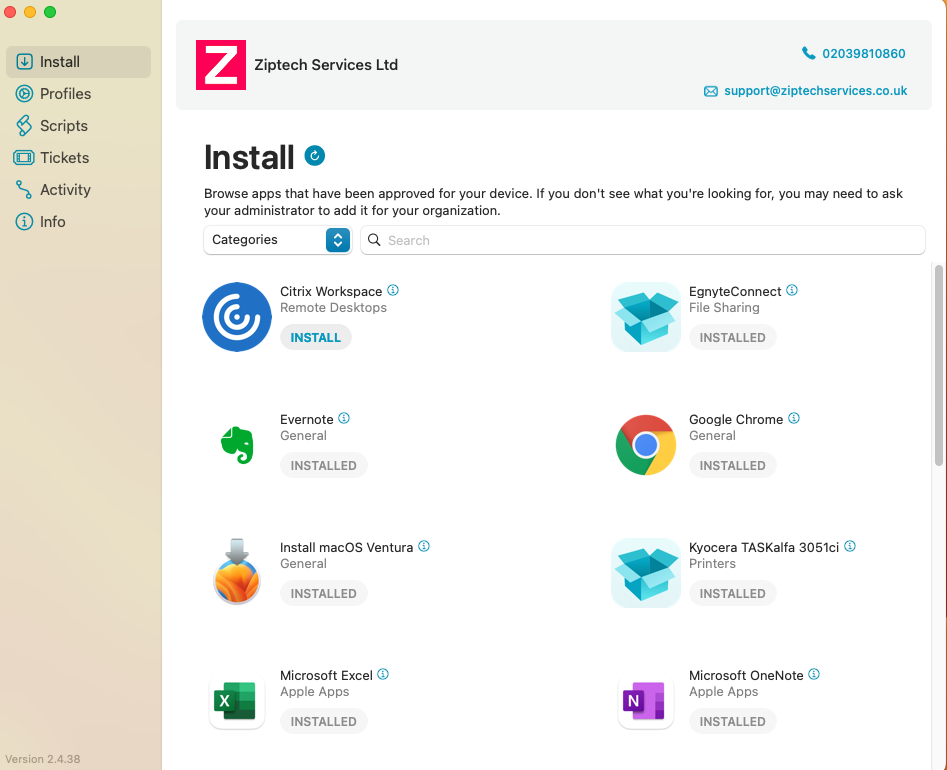
- By default the page should load on the 'Install' tab, find or search for the item you wish to install and select the blue 'INSTALL' text underneath the item.
If you're using the Self-Service Install page to install a newer macOS version (i.e. upgrading from Ventura to Sonoma)
Please see the following article for additional prompts and guidance on this process macOS Major Updates & Prompts
